Showing posts with label organizing. Show all posts

Monday, March 26, 2012

Organizing Baby Clothes


Pin It!
When have a little one, you can accumulate a lot of clothes, many of which they will only wear a few times because of how insanely fast they grow. But what do you with all the clothes once your kids have outgrown them? Get rid of them is probably the best option especially if you're not having anymore. But if you're planning on having more kids? No one wants to go buy all new clothes again when what you have right now are perfectly fine. But what are some good ways to organize them and put them away til then? Here's what I do:

I shed a little tear (not really, but I am a little sad) when Jordyn moves up a size in clothes. She's growing up was too fast. So is Dylan for that matter. We know that one day we want another child, but just not right now, so it pains to get rid of all of Jordyn's clothes when I know another one is in the future. So, packing up her clothes and putting them is what I need to do, so I can hang on to them for Baby #3.

I started out by washing all the clothes I'm going to pack away and sort them by size. For today, it's her 9 months clothes, and a very few 12 months. She's starting to outgrow her 12 months clothes but I can still squeeze another couple of wears out of most of them. LOL!

After sorting the clothes by size, I start with one size, 9 months, and begin to go through them. I pull out anything that is stained or with holes (there are not many because I am crazy about getting Jordyn's clothes dirty. Ask TJ. It drives him nuts. lol). Any that I do find, will either go in the trash or in with scrap fabrics to be cut up for projects later. This goes for outfits that I know Baby #3 won't wear. Maybe a few outfits I just wasn't a big fan of.

I also look for anything that has meaning or that I want to keep for Jordyn's hope chest (the one I have been trying to convince TJ to build since Jordyn was 7 weeks old. lol). Those items are usually the ones that describe her firsts: her first Halloween, Christmas, and so on. And sometimes I keep a favorite outfit that I had to buy her. In that instance, it's this oh-so-adorable sweater dress! It's one of my favorites and I wanted her to wear this dress in our family pictures last fall but TJ said, and I quote, "That is the ugliest thing I have ever seen. It looks like a blanket my grandmother would make." First of all, is he implying that his grandmother makes ugly blankets, and second of all, he just has no taste. I mean, just look how cute she is in it.

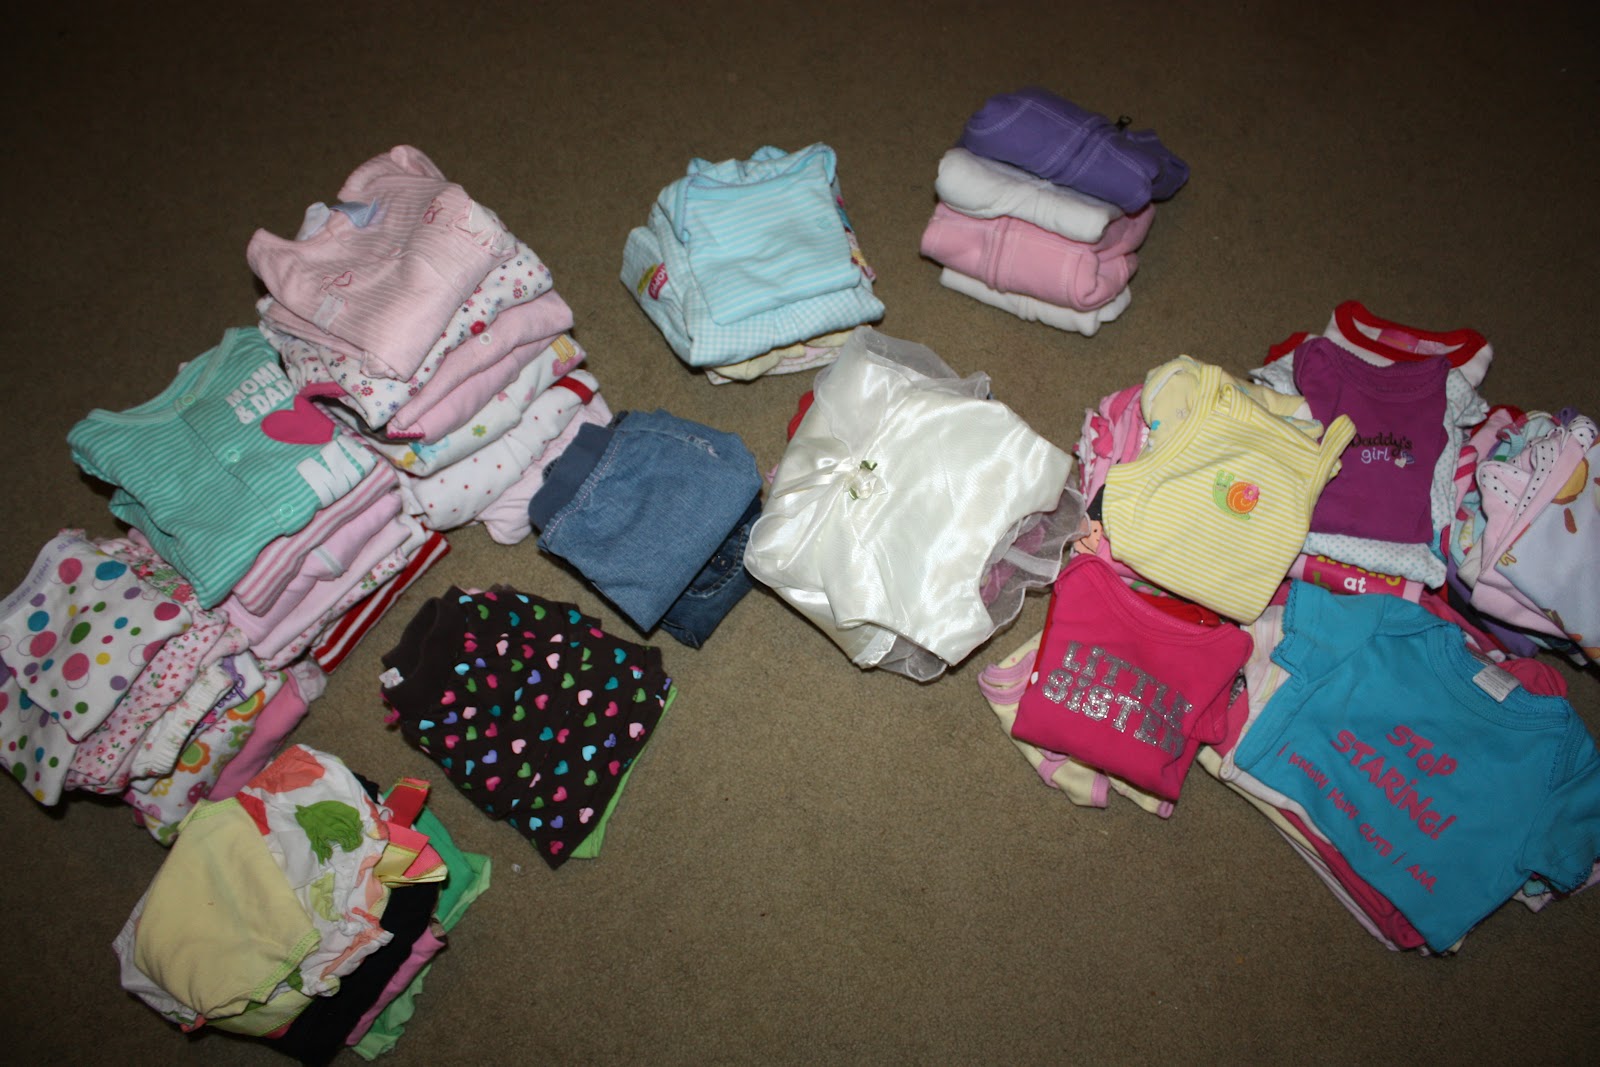
At the same time, I'm sorting through the ones that are no good, that are forever keepers, I'm pairing up outfits too.  Do you see all these piles? It may look like chaos, but it's organized chaos and will come together beautifully. LOL!

Once the initial sorting for me is done, I put those forever keepers away in their temporary home (man, I need that hope chest built. I wonder if I just go buy the pieces, will that get him to build it quicker. hehe) and put the no good clothes either in my scrap pile or the trash. Now I take all the clothes that need to be packed away and sort them into the type of clothing. All pajamas go together, matching sets together, pants, you get the idea.


I then put everything into a space saving bag keeping all pajamas together, all pants together, and so on. When the bag is full, I used my vaccum to suck the air out and I just labeled the bag with the clothing size. I have a few sizes that share a bag, because I either didn't have enough of one size to fill a bag or I had too much for just one bag so I had to put extras in another bag. After sucking the air out, I put the bags in a plastic tote and away into the closet until the tote is full, where I label the tote with the clothing sizes and name of whose they were.


Now, TJ can put the clothes in the attic until it's time for Baby #3.

A few things I will note. I have set a time limit on how long we keep these clothes. If Baby #3 has not arrived by the time Jordyn is 3, then I will get of all the clothes. Styles and your taste change, so some of these styles may not work for you and/or the new baby. If the next one is not a girl, then the clothes will go as well. We know after the next one, there will be no more, so there's no point in hanging on to something we won't use. Some of my favorite reasons for organizing Jordyn's clothes they I have are:

1.  When Baby #3 comes, I will only need to pull out the bags that are neccessary for that time frame and will not have to go through all the clothes
2.   If Baby #3 begins to grow out one type of clothes (pants) but not the rest, then I can pull out only the pants and they will all be together.
3.  Do I know someone in need looking for specific clothing sizes? Fantastic! I don't have to go through everything to find the right sizes or items.
4.  If I decide to sell them on Craigslist, or a yard sale, I can pick out which sizes I want to sell right away.

Organizing is a way to help make things in life run smoother and faster, and while this took a little bit of time out of my day, it didn't take as long as you might think and will save me time later.

How do you organize your baby clothes? Share it with me. You can upload your pics and links (if you have a site) via email, the Flickr group, or on my Facebook page and you could end up on Show Me Saturday!

Friday, February 24, 2012

Organize It Friday: Grocery Bags


Pin It!


Paper, plastic or reusable? What do you choose? I try very hard to bring my reusable bags with me when I go shopping. Unfortunately, I forget them more than I remember them. I'm working really hard to remember them. One was I do that is by putting them back in the car and keeping them in the car so they are there when I get to the store. But since I have been forgetting them, we have been given TONS of plastic grocery bags. While I definitely know they aren't the most eco-friendly, and am working towards a goal of not using them, I still have them in my house and I do keep them to use a trash bags or a wet clothes bag.

I don't know about you, but my stash of grocery bags can get out of control. And then I saw this idea, where they were being stores in a baby wipes container. GENIUS! They can still be kept under the sink, but can be contained so they don't look so crazy. I love it! What makes this even better is that there is a way to make each bag comes out as you use one.

Materials Needed

Plastic grocery bags
Baby Wipes Container

1.   Close the container, but open the part the allows you to pull the wipes through.

2.   Insert one bag through the opening but leave the handles sticking out.


3.   Take your next bag and straighten it out slip the end of it through the handles of the inserted bag.


4.  Then push it down into the container, leaving the handles out for the next bag.


7. Repeat this until the container if full or until you run of bags.

Now you have condensed your bags into a container that is not so chaotic. And when you need to use one, just pull one out and another pops out a little waiting for the next time you need to use one. So simple and easy!

How do you organize your grocery bags? Share it with me. You can upload your pics and links (if you have a site) via email, the Flickr group, or on my Facebook page and you could end up on Show Me Saturday!

Friday, February 3, 2012

Organize It Friday: OrgJunkie's 29 Day Challenge


Pin It!
2012 has brought on brand new goals for me. One of the goals it to become more organized. It is definitely a work in progress for me and my entire family. I am quickly learning that if you don't get the family involved in helping that staying organized is extremely hard. My husband loves that I am in an organizing and getting rid of stuff kick. He doesn't help with the initial process mainly because he knows I like it, which is perfectly fine with me. The problem....he doesn't always help keep everything organized once it's done, which makes me often feel like I'm starting over. He's getting better but for him, he doesn't have the desire to organize, so it will naturally take him longer to get used to the systems I have put in place. I just need to be patient. LOL!

One area of our house that has not been organized since we moved in (and is NO fault to TJ's) is my craft room. I've never had a craft room before, so I've never had any furniture or storage for my craft room before. We are currently in the process of building a craft desk (be on the lookout for that post this month). That should be done soon in this week. And then the organization can begin! Nothing has really been taken out of boxes and what few items have just begin to pile up on my sewing desk and book shelf. I will definitely have more containers and storage items that I will need to pick up but my goal is to do organize the room with the smallest budget I can.

Friday, January 27, 2012

Organize It Friday: Media Organization (and my first FREE printable!)


Pin It!


My husband and I love movies. Our kids (ok mainly our son, our daughter is too little) like movies too. And the Wii. Over the years, our collection of movies, TV shows and video games has grown. It has grown SO much that we don't have enough room on our 2 (mismatching) DVD stands. While they are organized (and slightly categorized and alphabetized) the extras stack neatly on the floor next to the stands.

I love my husband but he can be cheap sometimes. I have been asking, no begging, for this for about 2 years. I love the color, I love the fact that it has doors so you can't see the cases. I love everything about it. He keeps saying no and coming up with reasons why not to get it. A few months ago, we moved from out apartment to a house and in that move, one of the DVD stands broke. Not heartbroken at all, I finally had an excuse to get me media cabinet. We had decided to wait til after Christmas since it wasn't an absolute neccesity.  Besides, my parents had hinted that maybe they would get it for us for Christmas (they did not but us a freezer instead. WAY better). I had also decided that I wasn't going to pull the movies out of the two large boxes we have for two reasons: a) With only one stand, it would leave even more DVDs on the floor, and b) we have an adorable little monkey (aka daughter) who finds it absolutely entertaining to pull them off the stand and throw them on the floor and then mess up the ones stacked neatly on the floor (another reason to have a cabinet with doors). The holidays are over, and I still haven't gotten the cabinet. At $119, it's not to expensive, but my car needs new tires so the cabinet would have to wait. 

I, on the other, can not wait even longer to empty these two boxes and have easy access to our movies. I needed to come up with another alternative that is cheaper, yet still organized and stylish. Where can I go for something that would work and be in my budget? Yup, Target!

Friday, January 13, 2012

Organize It Friday: Lego Storage


Pin It!


My 6 yr old loves Legos, so much so that we built him this. Dylan has collected quite a collection of legos and with that has come, at times, a lego disaster in his room. He has two buckets for his legos to go in but one is full and the other is almost full, so I needed to devise something else that would work and hopefully organize his legos. That's when it hit me.

Wednesday, January 4, 2012

Repurpose Wednesday: Lego Table


Pin It!


I am super excited to share this project with you today! I found this project when I first joined pinterest. It's from a FABULOUS blog, Skip To My Lou. If you haven't checked out her blog, you should. It's great!

When I found her Ikea Table turned Lego Table I knew I had to make one for my Lego-loving 6 year old.

We don't have an Ikea close to us. The closest Ikea is 5 hours away in Atlanta. I know, it's horrible. I looked for the side table they used online but it is only sold in stores, so ordering online was out. Originally I was going to have my husband build the table, thinking it wouldn't cost that much to build the table. And it's not terribly expensive but more than I thought or was hoping it be. We instead found this Parsons side table from Walmart. Online it shows it for $18 but we paid $12.99. This was definitely cheaper than building the table ourselves. Plus we had already spent enough on the base plates. Those suckers get costly.

Thursday, December 1, 2011

Organize It Friday: Snack Baskets


Pin It!
Yesterday, I featured the I Heart Organizing blog as my very first Thankful Thursday post. I listed several projects of mine that Ireally love and also told you to be on the look out today for an organizing project of hers that I have tried out. Well here it is.

Now, this is not my first project of hers that I have completed. My first was the Schoolwork Storage project. There isn't a post on my blog about it (That project was done before I started my own blog.) but you can check out Jen's project here.

Browsing around one of my new favorite blogs I Heart Organizing, I found a new way to store our snacks seen here. I have been dividing out snacks into
individual portions for a while. That has made things really easy especially when we're in a rush to the bus stop in the morning. Dylan can just grab a bag and go and doesn't have to wait on me to fill one up. It also helps out with portion control for everyone, which is great for healthier eating. Previously I had been storing the snacks in a wicker bowl which was too small and it didn't make organizing the snacks very easy. Once I saw this plastic container, I knew it would look SO much better

After dividing our most recent purchase of snacks into individual portions, I then organized them neatly into the basket.

And here it is:


We don't have a pantry in our house so I have placed the basket on the counter so Dylan is able to reach it when he wants a snack!

I also made one for our refrigerated snacks (which was looking a little sparse today):

Friday, November 4, 2011

Christmas Planner


Pin It!
Pin It

Pinterest (you can follow me here), I found this Christmas Planner made with a composition notebook, scrapbook paper, ribbon, manila envelopes and some printables. I thought it was adorable, so I had to make one for myself. Besides I wanted to be a little more organized this year anyway, so it's extra exciting.

I followed the directions for the fantastic planner with a few changes. I don't have a large circle punch, like they suggested so I cut my "planner" circle out by hand. I also don't have a scalloped punch, which is why you won't find my "planner" circle with a border. If you have a circle punch large enough, I suggest using it. It would be much easier than cutting by handing

I also didn't ink the edges, but now I wish I had. I like the distressed look and I think it adds a little something extra. It's a completely optional step but I definitely like it.

My tabs varied slightly as might yours to the needs you have. I only used four tabs but their printable gives you eight. My tabs are Calendar, Gifts, Menu and To Do.

For my calendar tab, I used the same calendar site they suggested. I made a monthly calendar and weekly calendars. Just select your weeks and print them out. You then just cut it out and glue it in your planner.

In my Gifts Tab, I chose a few pages from Tip Junkie's Printable Christmas Planner. I shrunk them down to 80% and printed them out and they fit (after cutting them out of course. lol). Here is also where I put my Christmas Card. Christmas Your Way has some fantastic printables, where I recieved my Christmas Card Worksheet. This website also has tons of other Christmas planner worksheets that may be perfect for you and each worksheet allows you to type to fill it it in if you don't want to hand write.

I am SO excited to use my planner. Now that I'm done making it, it's time to fill it in!

Sunday, September 25, 2011

Closet Dividers


Pin It!

I LOVE to organize our closets. Except for our daughter's closet, they are organized length of sleeves followed by color for shirts and for bottoms, by length (shorts, capris, pants) followed by color. Yes, I m aware that it's crazy but our clothes look good in the closet. HAHA! And it is very easy to keep up with. Anyhow, with Jordyn, her clothes are a little different. Since she (and every other baby) changes sizes so often the first year, I have her clothes divided by size and within those sizes by color. I have many different sizes hung up in her closet and my husband just doesn't get that they are organized by size. He thinks if it's hung up, then it must fit her now. So I have come home from work many days with 7 month old baby wearing 12 month clothes. It's quite a site to see.

I have decided I needed to do something so that Jordyn is wearing the right size clothes, and what better way to make it easier for my husband to pick out clothes when I am not home then Closet Dividers.

These dividers are super simple, and inexpensive.

Here's what you need to get started:

Thin cardboard (I used a cereal box, but you can use a gift box too)
Scrapbook Paper
Scissors
Pen, Pencil, or Marker
Something round to help make your dividers (I used a formula lid)
Smaller round object for the hole in the center (needs to be slight larger than the pole for the closet rack)
Mod Podge and Foam Brush ( Can you believe I forgot to put that in the picture?)

1. Take your large round object and trace it onto the cardboard.

2. Slide your round object up some but be sure to overlap your first circle and trace your object

3. Using a straight edge connect the edges of circles together so that you form an oval on the outer shape.

4. Repeat Steps 1-3 for as many dividers as you want.

5. Cut out your dividers on the outer lines for all your dividers

6. Next use your smaller circle to trace a circle that will be cut out for the hole that will hang up the dividers.

7. Use your straight edge to draw a a line from the inner circle to the edge of cardboard. (This is what will allow you to hang up the dividers.

8. Cut out the holes and cut the line of your dividers.

9. Take your scrapbook paper and trace your dividers on the papers of your choice. Be sure you trace your divider once on each side. After tracing your paper, cut out the paper and match them up with each divider.

10. Place a thin layer of Mod Podge on one side of your divider. Line up your paper and apply the paper. Flip your divider over and repeat the process for the other side. Repeat this step for all of your dividers.

11. Lastly, label your dividers. You could be more creative than I was on this step. You don't have to write on them. You could use scrapbook stickers or anything else you choose. Use your imagination.


Saturday, September 10, 2011

Home Management Binder


Pin It!
Roaming around on pinterest, I have seen lots of organization tips, which is fantastic because I really do want to become more organized but haven't come across anything that strikes me and that I feel might work for me. One thing I have found that I think would be perfect for me and my family is a Home Management Binder, I found from A Bowl Full Of Lemons. She had some great categories and suggested some fantastic printables from Clean Mama's Etsy Shop.

To create your own binder, you will need the following materials:


3 ring binder
dividers
hole punch
pen
printables from Clean Mama Printables or any other site you find printables you like


First I want to start by saying that my binder is slightly different than the one on A Bowl Full Of Lemons but very similar.

To start my binder, I had to decide how many and what categories I wanted to use in my binder. These are the categories I chose:
Calendar
Schedules
Cleaning
Menu Planning
Finances
School
Medical
Contacts

My first section is the calendar section and I began with this "Week At A Glance" printable from Mommy Tracked, which is a printable recommended by A Bowl Full Of Lemons.  Behind that I have a calendar from Clean Mama Printables, which you can see below. This section also holds my to do lists.


Following my calendar section is my schedules section where I hold all our family schedules: from sports schedules, work schedules, and so on.

My third section is my cleaning section and for my cleaning section I have used more printables from Clean Mama Printables. She has a New Cleaning Kit which has 5 printables to cover all your cleaning lists. There's one for monthly cleaning, weekly cleaning seasonal and so on. It's perfect! Among the printables in my cleaning section, I am also holding "recipes" for different cleaning products I have found on Pinterest.


My fourth section is my menu planning section and where do you suppose I got these printables? You guessed it? Clean Mama Printables. She has a Menu Planning Kit that is incredible! With Monthly and Weekly Menu Planners, Inventory Sheets and Recipe Pages it has it all. I can't wait to make my recipe binder so I can use her recipe pages. Among my planning pages, I hold my shopping lists for the month or week and a contact sheet for any takeout from restaurants we may decide to use.


My fifth section is the finances section. This is where I use Clean Mama's Bill Pay and Budget Kit, which contains budget sheets, checklists and a receipt tracker. I also hold all my bills for the month here so they are all in one place. Once I pay them, I file them away. And in the back of the section I have a contact sheet with my account info and their phone numbers in case I need to call anyone for questions.


My sixth section is my school section. This is where I hold anything school related for my son and my husband. Anything from the lunch menus, to class schedules, to PTA schedules, and so on.


My seventh section is my medical section. And here I hold our emergency medical information sheet for any babysitters that we have that I downloaded from Organized Home. I also keep all of our doctor info and numbers, copies of our insurance cards and immunization forms here as well.

And my final section is my contacts section. It's where I keep numbers for our friends, family, local businesses, doctors, dentists, school numbers, work numbers, the vet and any other numbers I may need. I use contact forms from Organized Home.

WHEW!!! Lots of information all in one place. Just one more to step to a more organized house. Hope it works as well for you as it does for me.
Related Posts Plugin for WordPress, Blogger...