

When have a little one, you can accumulate a lot of clothes, many of which they will only wear a few times because of how insanely fast they grow. But what do you with all the clothes once your kids have outgrown them? Get rid of them is probably the best option especially if you're not having anymore. But if you're planning on having more kids? No one wants to go buy all new clothes again when what you have right now are perfectly fine. But what are some good ways to organize them and put them away til then? Here's what I do:
I shed a little tear (not really, but I am a little sad) when Jordyn moves up a size in clothes. She's growing up was too fast. So is Dylan for that matter. We know that one day we want another child, but just not right now, so it pains to get rid of all of Jordyn's clothes when I know another one is in the future. So, packing up her clothes and putting them is what I need to do, so I can hang on to them for Baby #3.
I started out by washing all the clothes I'm going to pack away and sort them by size. For today, it's her 9 months clothes, and a very few 12 months. She's starting to outgrow her 12 months clothes but I can still squeeze another couple of wears out of most of them. LOL!
After sorting the clothes by size, I start with one size, 9 months, and begin to go through them. I pull out anything that is stained or with holes (there are not many because I am crazy about getting Jordyn's clothes dirty. Ask TJ. It drives him nuts. lol). Any that I do find, will either go in the trash or in with scrap fabrics to be cut up for projects later. This goes for outfits that I know Baby #3 won't wear. Maybe a few outfits I just wasn't a big fan of.

I also look for anything that has meaning or that I want to keep for Jordyn's hope chest (the one I have been trying to convince TJ to build since Jordyn was 7 weeks old. lol). Those items are usually the ones that describe her firsts: her first Halloween, Christmas, and so on. And sometimes I keep a favorite outfit that I had to buy her. In that instance, it's this oh-so-adorable sweater dress! It's one of my favorites and I wanted her to wear this dress in our family pictures last fall but TJ said, and I quote, "That is the ugliest thing I have ever seen. It looks like a blanket my grandmother would make." First of all, is he implying that his grandmother makes ugly blankets, and second of all, he just has no taste. I mean, just look how cute she is in it.

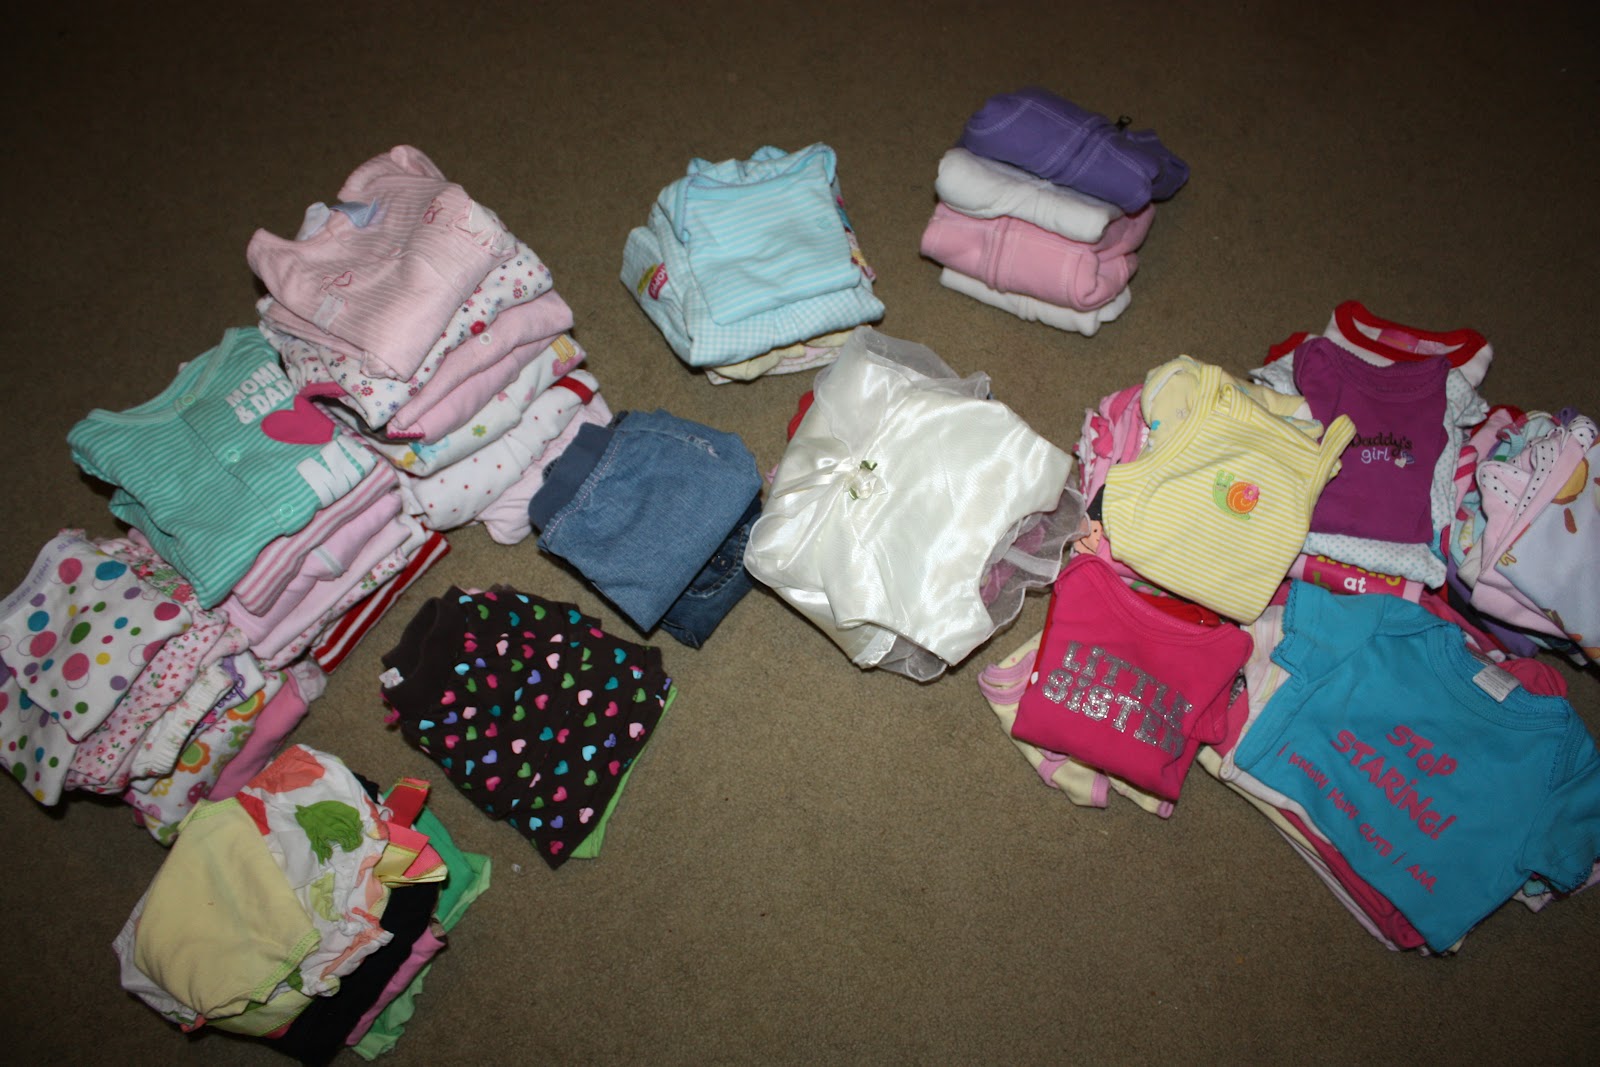
At the same time, I'm sorting through the ones that are no good, that are forever keepers, I'm pairing up outfits too. Do you see all these piles? It may look like chaos, but it's organized chaos and will come together beautifully. LOL!
Once the initial sorting for me is done, I put those forever keepers away in their temporary home (man, I need that hope chest built. I wonder if I just go buy the pieces, will that get him to build it quicker. hehe) and put the no good clothes either in my scrap pile or the trash. Now I take all the clothes that need to be packed away and sort them into the type of clothing. All pajamas go together, matching sets together, pants, you get the idea.

I then put everything into a space saving bag keeping all pajamas together, all pants together, and so on. When the bag is full, I used my vaccum to suck the air out and I just labeled the bag with the clothing size. I have a few sizes that share a bag, because I either didn't have enough of one size to fill a bag or I had too much for just one bag so I had to put extras in another bag. After sucking the air out, I put the bags in a plastic tote and away into the closet until the tote is full, where I label the tote with the clothing sizes and name of whose they were.

Now, TJ can put the clothes in the attic until it's time for Baby #3.
A few things I will note. I have set a time limit on how long we keep these clothes. If Baby #3 has not arrived by the time Jordyn is 3, then I will get of all the clothes. Styles and your taste change, so some of these styles may not work for you and/or the new baby. If the next one is not a girl, then the clothes will go as well. We know after the next one, there will be no more, so there's no point in hanging on to something we won't use. Some of my favorite reasons for organizing Jordyn's clothes they I have are:
1. When Baby #3 comes, I will only need to pull out the bags that are neccessary for that time frame and will not have to go through all the clothes
2. If Baby #3 begins to grow out one type of clothes (pants) but not the rest, then I can pull out only the pants and they will all be together.
3. Do I know someone in need looking for specific clothing sizes? Fantastic! I don't have to go through everything to find the right sizes or items.
4. If I decide to sell them on Craigslist, or a yard sale, I can pick out which sizes I want to sell right away.
Organizing is a way to help make things in life run smoother and faster, and while this took a little bit of time out of my day, it didn't take as long as you might think and will save me time later.
How do you organize your baby clothes? Share it with me. You can upload your pics and links (if you have a site) via email, the Flickr group, or on my Facebook page and you could end up on Show Me Saturday!
I shed a little tear (not really, but I am a little sad) when Jordyn moves up a size in clothes. She's growing up was too fast. So is Dylan for that matter. We know that one day we want another child, but just not right now, so it pains to get rid of all of Jordyn's clothes when I know another one is in the future. So, packing up her clothes and putting them is what I need to do, so I can hang on to them for Baby #3.
I started out by washing all the clothes I'm going to pack away and sort them by size. For today, it's her 9 months clothes, and a very few 12 months. She's starting to outgrow her 12 months clothes but I can still squeeze another couple of wears out of most of them. LOL!
After sorting the clothes by size, I start with one size, 9 months, and begin to go through them. I pull out anything that is stained or with holes (there are not many because I am crazy about getting Jordyn's clothes dirty. Ask TJ. It drives him nuts. lol). Any that I do find, will either go in the trash or in with scrap fabrics to be cut up for projects later. This goes for outfits that I know Baby #3 won't wear. Maybe a few outfits I just wasn't a big fan of.
I also look for anything that has meaning or that I want to keep for Jordyn's hope chest (the one I have been trying to convince TJ to build since Jordyn was 7 weeks old. lol). Those items are usually the ones that describe her firsts: her first Halloween, Christmas, and so on. And sometimes I keep a favorite outfit that I had to buy her. In that instance, it's this oh-so-adorable sweater dress! It's one of my favorites and I wanted her to wear this dress in our family pictures last fall but TJ said, and I quote, "That is the ugliest thing I have ever seen. It looks like a blanket my grandmother would make." First of all, is he implying that his grandmother makes ugly blankets, and second of all, he just has no taste. I mean, just look how cute she is in it.

At the same time, I'm sorting through the ones that are no good, that are forever keepers, I'm pairing up outfits too. Do you see all these piles? It may look like chaos, but it's organized chaos and will come together beautifully. LOL!
Once the initial sorting for me is done, I put those forever keepers away in their temporary home (man, I need that hope chest built. I wonder if I just go buy the pieces, will that get him to build it quicker. hehe) and put the no good clothes either in my scrap pile or the trash. Now I take all the clothes that need to be packed away and sort them into the type of clothing. All pajamas go together, matching sets together, pants, you get the idea.

I then put everything into a space saving bag keeping all pajamas together, all pants together, and so on. When the bag is full, I used my vaccum to suck the air out and I just labeled the bag with the clothing size. I have a few sizes that share a bag, because I either didn't have enough of one size to fill a bag or I had too much for just one bag so I had to put extras in another bag. After sucking the air out, I put the bags in a plastic tote and away into the closet until the tote is full, where I label the tote with the clothing sizes and name of whose they were.

Now, TJ can put the clothes in the attic until it's time for Baby #3.
A few things I will note. I have set a time limit on how long we keep these clothes. If Baby #3 has not arrived by the time Jordyn is 3, then I will get of all the clothes. Styles and your taste change, so some of these styles may not work for you and/or the new baby. If the next one is not a girl, then the clothes will go as well. We know after the next one, there will be no more, so there's no point in hanging on to something we won't use. Some of my favorite reasons for organizing Jordyn's clothes they I have are:
1. When Baby #3 comes, I will only need to pull out the bags that are neccessary for that time frame and will not have to go through all the clothes
2. If Baby #3 begins to grow out one type of clothes (pants) but not the rest, then I can pull out only the pants and they will all be together.
3. Do I know someone in need looking for specific clothing sizes? Fantastic! I don't have to go through everything to find the right sizes or items.
4. If I decide to sell them on Craigslist, or a yard sale, I can pick out which sizes I want to sell right away.
Organizing is a way to help make things in life run smoother and faster, and while this took a little bit of time out of my day, it didn't take as long as you might think and will save me time later.
How do you organize your baby clothes? Share it with me. You can upload your pics and links (if you have a site) via email, the Flickr group, or on my Facebook page and you could end up on Show Me Saturday!


